
Have you ever wondered how your four-wheeled pet made it to the streets? The revolution of automobile design is a subject in its own right, so right now we are only focusing on the mass production of these metal beasts. The process is not only efficient, but the scale and the minute details are absolutely fascinating. Have you ever thought you’d find a detailed post describing how a car is made? Well now you don’t have to, because thanks to the internet you can do it in mere seconds; it’s as easy as visiting an online store, an Instagram profile or websites like promocodejunkie.com that offer a wide variety of promotional codes for their users. Thanks, internet! Since I’m guessing you’re here for cars – here is how cars are made, step by step.
Design
The design of a car is aimed at providing the customer with some eye-candy, but it’s much more than that. A lot of thought is put into the proper placement of the parts, the aerodynamics, and the materials used. Lighter materials mean less fuel consumption, after all.
 Parts
Parts
There is no need for us to jump into the factories and see how robots are doing their part. First of all, to build a car, one needs components. These components may come from separate factories and manufacturing plants, depending on how the company wants to handle their cost of labor.
Each part of the car comes from a metal sheet and each of them is inspected to make sure the quality is up to standard. The parts are then separated into two groups: those that go into the development of the chassis – the frame and the skeleton of your car, and those that are made for the body of the car.
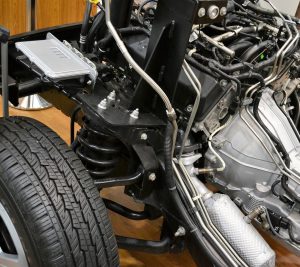
The Frame
Imagine the frame as a skeleton inside your car’s body. Sure, it may not be as pretty as the final picture, but it’s what the car relies on and what holds all of the other parts. The chassis is placed on the production line, where the gas tank, suspension, and other parts are added to it.
The Bod
Now it’s time for the robots to combine welding and lego-like assembly to the car. Different panels are bolted or welded together, making it now look like something you see in a junkyard. It is during this part of the process that the shell is being constructed. Your car now has a roof, the doors, the trunk lid and other things that make it recognizable. Some assembly may be required.
 Paint
Paint
Before painting, it is necessary to double-check for dents and imperfections under a strong white light. Then, the car is cleaned to make sure there’s no debris that might cause discomfort or damage the car. After that, it is time for the E-coat or the Electrophoretic Painting Process. Think of it as a protective layer before putting on actual paint. Finally, the robots can spray-paint the car.
Finishing Touches
The frame and the body become one. The motor is tested, along with other individual components. Final pieces that are added to the car are the things that are minute compared to the big picture but are necessary for the car to actually move – the tires, the battery, the antifreeze, and the gasoline.
It is now time for the final check – a test drive to make sure everything is in working order, paying special attention to acceleration, braking, fuel consumption and the like. Congratulations! Your car is now operational and ready to be picked up.